Moving from GCP to AWS - a short journey
Changing cloud providers has never been easier


Share this story
In the following lines, I will describe the somewhat short journey of moving out of the Google Cloud Platform to a new AWS instance and all the steps necessary to make this possible.
Don't get the wrong idea: GCP seems to be a very good product/platform, however, for our start-up needs - a very simple blogging platform - it did not make sense to use it anymore.
Keep the old, but move on
Before making any drastic changes, I decided to keep the "live" version of the blog running, to have a backup of the work. Keeping the old, before making any big modifications, is always a good idea :)
Step 1: Provisioning a brand new AWS instance
Amazon Web Services has a great offering and it is very easy to sign-up and start up the instance.
You just need to decide on an account name, fill in the contact details, a payment method and you're set!
An important aspect is to choose carefully your zone (US/Africa/Asia/Canada/Europe/Middle East/South America) and the instance type - which determines the number of virtual CPUs you will have. You'll be able to select the AMI (Amazon Machine Image) flavor - I've opted for a Linux version and the HDD capacity (max 30 GB SSD).
Important: Generate your security key pair and save the resulting .pem file so that you can securely ssh to your instance!
Step 2: Configuring the new AWS instance
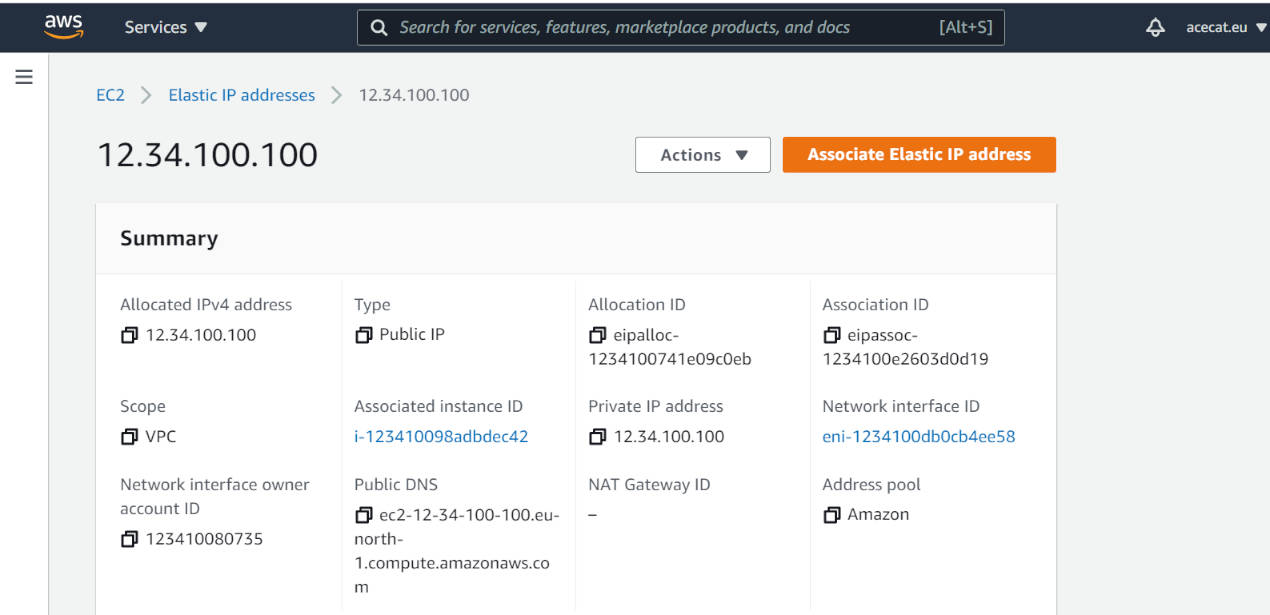
By default, all EC2 instances receive a public IPv4 address, but this is not a static address: if you stop & start again the instance, it will have another IP address. This is not the desired behavior, because having public static IPs offers numerous advantages: the loyalty of your customers, among others.
The solution is to add the so-called Elastic IP address, which will be accessible from the Internet and it will also be static, i.e. it will not change until it is manually released. It's free of cost as long as it is associated with a running instance.
Extremely easy to create - but don't forget to make the associating between the EIP and your instance!
Make sure to open up ports 80 and 443 on your instance, by adding a new security group.
The last task of this step is to make the necessary DNS modifications so that the domain points to the new public EIP address of the AWS instance.
Add a new DNS record of type A with host @ pointing to the new elastic IPv4 address from AWS.
This is done on the domain provider's page, in my case it's GoDaddy:
Step 3: Apache Web Server
For the web server part, I've chosen Apache HTTP Web Server because it's easy to configure and it's flexible, reliable and has regular security patches. It seems that 67% of all servers out there are using it!
Very simple to install on a Linux environment:
sudo apt install apache2Here you can find an easy to follow tutorial. Configure the firewall as mentioned in there.
After installing the web server, we should check to see if it's running:
ubuntu@ip-12-34-100-100:~$ sudo service apache2 status
● apache2.service - The Apache HTTP Server
    Loaded: loaded (/lib/systemd/system/apache2.service; enabled; vendor preset: enabled)
    Active: active (running) since Tue 2021-03-16 10:10:34 UTC; 4 days ago
      Docs: https://httpd.apache.org/docs/2.4/
   Process: 57474 ExecReload=/usr/sbin/apachectl graceful (code=exited, status=0/SUCCESS)
  Main PID: 32859 (apache2)
     Tasks: 55 (limit: 1130)
    Memory: 15.8M
    CGroup: /system.slice/apache2.service
            ├─32859 /usr/sbin/apache2 -k start
            ├─57478 /usr/sbin/apache2 -k start
            └─57479 /usr/sbin/apache2 -k start

     Mar 16 10:10:34 ip-12-34-100-100 systemd[1]: Starting The Apache HTTP Server...
The configuration of the Apache Web Server consists in updating the main configuration file found in:
cd /etc/apache2<Directory /path/to/acecat>
Options Indexes FollowSymLinks
AllowOverride None
Require all granted
</Directory>cd /etc/apache2/sites-enabled<VirtualHost *:80>
# The ServerName directive sets the request scheme, hostname and port that
# the server uses to identify itself. This is used when creating
# redirection URLs. In the context of virtual hosts, the ServerName
# specifies what hostname must appear in the request's Host: header to
# match this virtual host. For the default virtual host (this file) this
# value is not decisive as it is used as a last resort host regardless.
# However, you must set it for any further virtual host explicitly.
# ServerName www.example.com
ServerAdmin webmaster@localhost
DocumentRoot /path/to/acecat
</VirtualHost>You will probably want to secure your website, making it possible for your users to use the https protocol while accessing the content. In order to do so, you will need to enable SSL on Apache:
sudo a2enmod ssl<IfModule mod_ssl.c>
<VirtualHost *:443>
# The ServerName directive sets the request scheme, hostname and port that
# the server uses to identify itself. This is used when creating
# redirection URLs. In the context of virtual hosts, the ServerName
# specifies what hostname must appear in the request's Host: header to
# match this virtual host. For the default virtual host (this file) this
# value is not decisive as it is used as a last resort host regardless.
# However, you must set it for any further virtual host explicitly.
# ServerName www.example.com
ServerAdmin webmaster@localhost
DocumentRoot /path/to/acecat
</VirtualHost>
</IfModule>Step 4: Making the site secure via certbot
Certbot is a free and open-source tool for creating and managing SSL certificates. The SSL certificates are issued by Let's Encrypt, a Certificate Authority that provides TLS certificates to 240 millions of websites.
A useful feature of certbot is the auto-renewal of certificates, via a background service so you don't have to intervene manually every ~ 3 months.
The certbot webpage has instructions on how to generate and administer the certificates, based on a variety of server software and system combinations. For my purposes, I've selected Apache server running on a Ubuntu 20.04. system.
I have installed certbot via snap:
sudo snap install core; sudo snap refresh coresudo snap install --classic certbotAnd now comes the most interesting part:
Migrate existing certbot SSL certificates to a new server
As mentioned in the beginning of this article, I am moving out of a Google Cloud Platform product, where an instance (server) was configured to host this blog site. Seeing how my site was already secure with SSL certificates in place, I just want to reuse the certificates I have.
This article provides an excellent explication of the process in case you are using Nginx.
On the old instance we'll need to backup both the archive and renewal directories:
sudo su
cd /etc/letsencrypt
tar -chvzf mycerts.tar.gz options-ssl-apache.conf archive/acecat.eu renewal/acecat.eu.conf
After copying the archive over to the new AWS instance, we'll need to extract the backup files:
cd /etc/letsencrypt
sudo tar -xvf mycerts.tar.gzsudo ln -s /etc/letsencrypt/archive/acecat.eu/cert100.pem /etc/letsencrypt/live/acecat.eu/cert.pem
sudo ln -s /etc/letsencrypt/archive/acecat.eu/chain100.pem /etc/letsencrypt/live/acecat.eu/chain.pem
sudo ln -s /etc/letsencrypt/archive/acecat.eu/fullchain100.pem /etc/letsencrypt/live/acecat.eu/fullchain.pem
sudo ln -s /etc/letsencrypt/archive/acecat.eu/privkey100.pem /etc/letsencrypt/live/acecat.eu/privkey.pemNow remember that I only installed the certbot, I have not run it with --apache option because I did not want to generate new certificates. This means that the registration part has not been executed yet, hence we'll need to register a new email address with certbot:
ubuntu@ip-12-34-100-100:/etc/letsencrypt$ sudo certbot register --email=contact@acecat.eu
Saving debug log to /var/log/letsencrypt/letsencrypt.log

- - - - - - - - - - - - - - - - - - - - - - - - - - - - - - - - - - - - - - - -
Please read the Terms of Service at
https://letsencrypt.org/documents/LE-SA-v1.2-November-15-2017.pdf. You must
agree in order to register with the ACME server. Do you agree?
- - - - - - - - - - - - - - - - - - - - - - - - - - - - - - - - - - - - - - - -
(Y)es/(N)o: Y

- - - - - - - - - - - - - - - - - - - - - - - - - - - - - - - - - - - - - - - -
Would you be willing, once your first certificate is successfully issued, to
share your email address with the Electronic Frontier Foundation, a founding
partner of the Let's Encrypt project and the non-profit organization that
develops Certbot? We'd like to send you email about our work encrypting the web,
EFF news, campaigns, and ways to support digital freedom.
- - - - - - - - - - - - - - - - - - - - - - - - - - - - - - - - - - - - - - - -
(Y)es/(N)o: N
Account registered.Now we are ready to test certbot:
sudo certbot renew --dry-runIf the previous command does not output any errors, feel free to execute it without the --dry-run option!
Step 5: CORS is a pain, but it must be done
A problem that you may encounter is CORS Cross-origin resource sharing, if you decide to use resources located on a different domain.
After researching here, I have solved my CORS issue by configuring my Apache web server:
<IfModule mod_headers.c>
  Header set Access-Control-Allow-Origin "*"
</IfModule>
Be aware that setting Access-Control-Allow-Origin to "*" might not be the best setting for your case.
This block of code needs to be added in the VirtualHost configuration files in:cd /etc/apache2/sites-enabledWe can test the Apache configuration files with a simple command that will check the syntax:
apachectl -ta2enmod headerssudo service apache2 status
sudo service apache2 stop
sudo service apache2 startStep 6: Closing the Google Cloud project
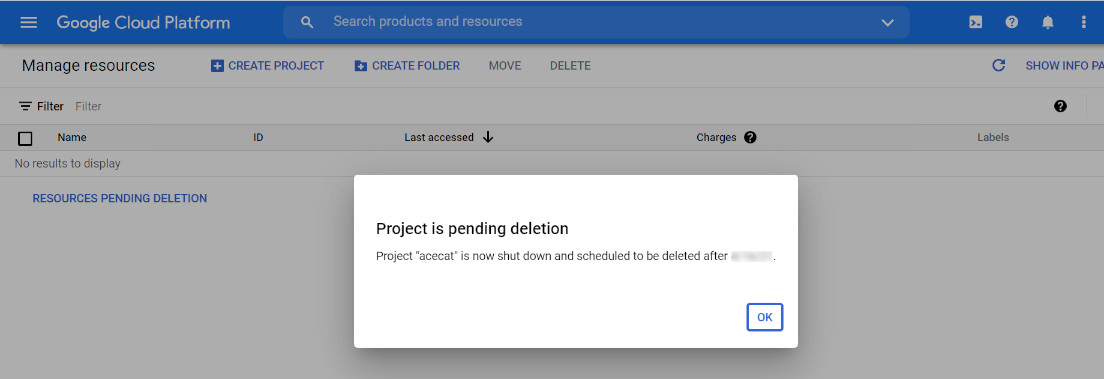
And now, for the final step, after verifying that the blog is up & running, we will close the GCP project for good. No need to waste resources.

The GCP project will be scheduled for deletion in 30 days:
Share:
Our Story
A little bit about AceCat
We are AceCat, a software company with quality at heart.
We aim to provide new ideas, thoughts and expertise in the IT field.
Our goal is to educate, spread the knowledge and build a better future for all of us.
We discuss both hard-skill, technical topics from the Software Development world, and soft skill-related issues.


Contact us
Say HI!
If you like what you see or find something to be improved, contact us here:
Brought to you with

by AceCat
